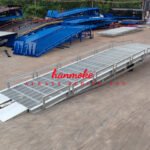
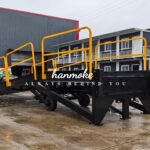
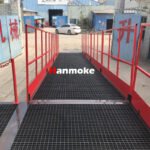
Every failed dock equipment installation we have been asked to rescue in thirty years of building loading platforms failed at one of two places: the concrete under the machine, or the anchors between the machine and the concrete. The equipment itself almost never fails first. A 10-ton dock leveler that cycles fifty times a day is a repetitive-impact machine, and a free-standing dock carrying a loaded forklift is a point-load machine – both of them transfer their entire working life into a patch of concrete slab that was poured for a warehouse floor, not for a machine foundation. This article is the checklist we send to customers before they order bolt-down equipment: what to measure, what we ship in the anchor kit, what the slab has to do, and the details that quietly cause failures years later.
The Slab Carries the Machine, Not the Other Way Round
Start with what the foundation actually experiences. When a 3-ton forklift with a 2-ton pallet crosses a dock leveler lip, the impact load at the lip is not 5 tons in a smooth line – it is a concentrated front-axle load hitting a local spot as the wheel climbs the transition, typically 60-65 % of the combined weight on one axle, doubled briefly by the bump. Over a year of two shifts, that is hundreds of thousands of load cycles on the same square metre. Concrete is very good at static compression and poor at repeated local impact close to a free edge.
This is why the questions that matter are not about the machine’s tonnage rating but about the slab’s condition: thickness, reinforcement, strength, and distance to joints and edges. A leveler bolted 300 mm from a saw-cut joint behaves like a leveler bolted to a cantilever – the joint gives the concrete nowhere to distribute the load, and the anchor zone cracks in a fan pattern around the bolt. We have seen this exact failure on installations where the machine was placed correctly but the bay layout ignored the joint map.
The Site Survey: Five Things to Check Before You Order
Before you request a quotation, walk the bay with a tape, a straightedge, and if possible a cover meter (rebar scanner). Five checks, in order of how often they change the design:
- Slab thickness. Most industrial slabs are 150-200 mm (6-8 in), but older or lightly specified buildings can be 100 mm. Drill one 12 mm pilot hole in a corner of the work area and measure, or use a GPR scan. If you find 100 mm unreinforced slab, tell us – the answer is usually a thicker plinth under the equipment, not a smaller machine.
- Reinforcement. A mesh-reinforced slab (typically A142-A252 fabric or rebar) anchors far better than plain concrete. The scanner also tells you where the bars are so the installer can avoid cutting them.
- Level and flatness. Lay the straightedge where each baseplate or frame line will sit. More than about 5 mm of gap under a 2 m straightedge means grouting work at installation. It is cheap to know this before the container ships and annoying to discover with the machine on site.
- Joint and edge map. Sketch every saw-cut joint, expansion joint and slab edge in the bay. Anchor positions need to respect them – see the edge-distance rules below.
- Concrete strength. If you have the building’s structural drawings, note the specified grade (25-40 MPa is typical). If not, ask whether any core test data exists. You do not usually need a new core test for a 10-ton leveler, but you do need to know you are not anchoring into a 15 MPa patch repair.
Photograph everything. When a customer sends us five photos of the slab, the joints and the wall face, we can return an anchor plan with the quotation. When they send nothing, we ship a generic layout and the installer makes judgment calls – which is where the trouble starts.
What We Ship in the Anchor Kit
Our installation manuals specify the anchor hardware for each product family. The table below is the typical specification across the range – always verify against the installation drawing packed with your unit, because custom configurations sometimes change the baseplate layout.
| Equipment | Typical anchor | Quantity per unit | Min. embedment | Installation torque |
|---|---|---|---|---|
| Edge-of-dock leveler (EOD) | M12 mechanical wedge anchor, grade 8.8 | 6-8 | 70 mm | 80-90 Nm |
| Pit / face-mounted hydraulic dock leveler (HLSH / HLSH-EXT) | M16 mechanical wedge or chemical anchor, grade 8.8 | 8-12 | 120 mm | 195-210 Nm |
| Free-standing loading dock (HRFA 10 t) | M16 chemical anchor, grade 8.8 | 12-16 | 120 mm | 195-210 Nm |
| Dock ramp platform (HRAY) | M16 mechanical wedge anchor, grade 8.8 | 8-10 | 120 mm | 195-210 Nm |
| Modular loading dock platform (HRFD 20 t) | M20 chemical anchor, grade 8.8 | per module, 8-12 | 150 mm | 380-400 Nm |
A note on chemical versus mechanical anchors, because installers ask every time. Mechanical wedge anchors are faster and cheaper and are perfectly fine in sound, uncracked concrete away from edges – that covers most interior pit levelers and platform installations. Chemical (adhesive) anchors put less splitting stress into the concrete, hold better close to edges and in marginal slab conditions, and are what we specify for free-standing docks, where the whole structure’s stability depends on the anchor group. The trade-off is cure time and temperature sensitivity: most adhesive systems need 12-24 hours at 20 °C before you torque them, and cold stores need the low-temperature cure times from the adhesive manufacturer’s data sheet.
Pit, Face-Mount or Free-Standing: What Each Foundation Needs
The three mounting routes make very different demands on your building. This comparison is the one we draw on whiteboards for customers choosing between them:
| Mounting route | Foundation work required | Slab condition wanted | Typical downtime |
|---|---|---|---|
| Pit-mounted dock leveler | Form and cast a pit to the leveler drawing, rebar hooks into the slab, 25-30 MPa concrete; cure before loading | Sound slab with structural drawings available; pit walls take lateral loads | 2-4 weeks incl. cure |
| Face-mounted exterior leveler | Anchor to structural wall face or cast a reinforced plinth; thickened approach slab where the yard slopes | Wall with masonry or concrete backup behind the render; slab 150 mm + | 2-5 days per 2-4 bays |
| Free-standing dock (no building) | Level reinforced slab 150 mm minimum, anchor group per drawing, grout baseplates | Slab designed for forklift traffic; no hollow-core or post-tensioned elements in the anchor zone | 1-3 days per unit |
The face-mounted route has quietly become our most common retrofit request, especially from cold-chain and food plants, because it adds dock equipment without touching the slab inside the building. But it shifts the burden to the wall: a leveler pulling and pushing against a rendered blockwork wall with no structural backup will work the anchors loose within months. The cure is a plinth or through-bolted backing – both of which are far cheaper to decide during quotation than to discover at installation.
Edge Distance, Joints and the Details That Bite Later
Three rules prevent most long-term anchor problems, and none of them are about the bolts themselves:
- Edge distance. As a working rule from our installation manuals, keep anchors at least 150 mm (6 in) from any slab edge or opening on M16 anchors, and scale up proportionally for M20. Closer than that and the concrete can spall a cone of material off the edge under load, which converts your anchor into decoration.
- Joint separation. Do not place anchors within about 250 mm of a saw-cut or expansion joint. If the equipment footprint forces an anchor near a joint, tell us – the baseplate layout can usually be shifted, because the bolt pattern has tolerance built in. What you cannot shift is the joint.
- Un-tightened or over-tightened bolts. Torque is not a suggestion. Under-torqued wedge anchors rely on friction they do not have, and over-torqued chemical anchors can strip the adhesive bond before it cures. Use a calibrated wrench; the values in the table above assume clean, dry threads in sound concrete.
One more thing we check on every site photo: what is under the slab. Voids under slabs – from settlement, from buried services, from old trenches backfilled loosely – are invisible from the surface and ruin anchor performance. If the building had a former drainage run or sunken utility trench through the bay, ask for the as-built drawings before anchoring anything heavier than a bench.
Fixing a Slab That Is Not Ready
Nobody’s slab is perfect, and the fixes are routine if you know about them in advance:
- Low patches and spalls under baseplate lines: repair with a structural epoxy or cementitious grout rated above 40 MPa compressive strength. Feather-edge patch compounds for floor cosmetics are not anchor substrates.
- Leveling: more than 5 mm out of level under a frame line gets non-shrink grout under the baseplate at installation. Budget the grout and a bag or two – it is a 20-dollar item that prevents a day of shimming.
- Thin or unreinforced slab: cast a local thickened plinth (typically 200-300 mm, dowelled or keyed into the existing slab) and anchor into that. This is standard for free-standing docks on marginal floors and adds maybe two days to the schedule.
- Contaminated or oil-soaked concrete (classic in old workshops): chemical anchors need sound, clean drilled holes; oil defeats the adhesive. Either mechanically abrade and wash the holes per the adhesive system’s procedure, or move to mechanical anchors and larger embedment.
The pattern across all of these: the concrete work is a fraction of the equipment cost and nearly all of the installation risk. Spending an afternoon on the survey protects the money you are about to spend on steel.
Can I install a dock leveler on a 100 mm slab?
Not directly on unreinforced 100 mm concrete – the embedment alone eats half the slab. The standard answer is a local plinth or pad cast to 200 mm or more and anchored into that, or re-siting the equipment to a thicker bay. Send us the slab measurement and we will propose the layout.
How long must concrete cure before anchoring and loading?
For new plinths and pit walls, we ask for 7 days minimum before torquing anchors and 28 days before full forklift traffic, in line with normal structural concrete practice. Adhesive anchors add their own cure time – 12-24 hours at 20 °C for most systems, longer in cold stores.
Chemical or mechanical anchors – which should I use?
Use mechanical wedge anchors in sound, uncracked interior slabs away from edges – faster and cheaper. Use chemical anchors for free-standing docks, installations near slab edges or joints, and any slab you are not fully sure about, because they stress the concrete less and tolerate marginal conditions better.
Who supplies the anchors – me or the factory?
We supply the anchor specification and the drilling template with every unit, and can pack the anchor hardware with the shipment so your installer has matched parts on day one. Local purchase is also fine – just hold the grade and embedment in the installation drawing, because substituting lighter bolts voids the structural part of the warranty.
Send Us the Slab Photos – Get the Anchor Plan Free
Every quotation we produce includes an anchor plan reviewed by the engineers who designed the machine. Photograph your slab, joints and wall, send the five survey results above along with your bay dimensions through our contact page, and we will return the anchoring layout with the proposal. If you are still choosing the equipment route, start with the dock leveler category, the free-standing loading dock category, or go straight to the HRFA 10-ton free-standing dock and the dock ramp platform range – the mounting notes on each product page tell you what the slab needs to look like before the machine arrives.